“`html
Is a Running Exhaust Fan Actually a Problem
Your bathroom exhaust fan won’t turn off. It’s been running for hours. Maybe days. As someone who grew up in Seattle and now spends half my time helping homeowners across the Pacific Northwest troubleshoot moisture problems, I can tell you this is one of the most common complaints I hear—especially between October and March when indoor humidity climbs above 70%.
The short answer: yes, it’s worth investigating. But before you panic, let me explain why this happens so frequently in our climate.
The PNW’s wet winters create ideal conditions for stuck humidity sensors and faulty timers. Your exhaust fan’s entire job is removing moisture when your bathroom steams up during showers. In drier climates, a fan running for 20 minutes solves the problem. Here, that moisture lingers. Sensors stay triggered longer. Components work overtime. That’s when they fail.
A continuously running exhaust fan wastes energy — we’re talking $10 to $25 per month in electricity costs depending on your fan’s wattage and local rates. Over a year, that adds up to a second or third electric bill. Beyond the money, a fan that won’t shut off signals a moisture control failure. Your bathroom isn’t drying properly when it should be.
Probably should have opened with this section, honestly. You also need to know the difference between “my fan runs longer than expected” and “my fan literally won’t turn off.” The first might be normal. The second requires diagnosis. If turning off the wall switch stops the fan, your issue is the switch or its wiring. If the fan keeps running even after you flip the switch or cut power at the breaker — that’s a relay failure or stuck sensor. That’s when professional help becomes essential.
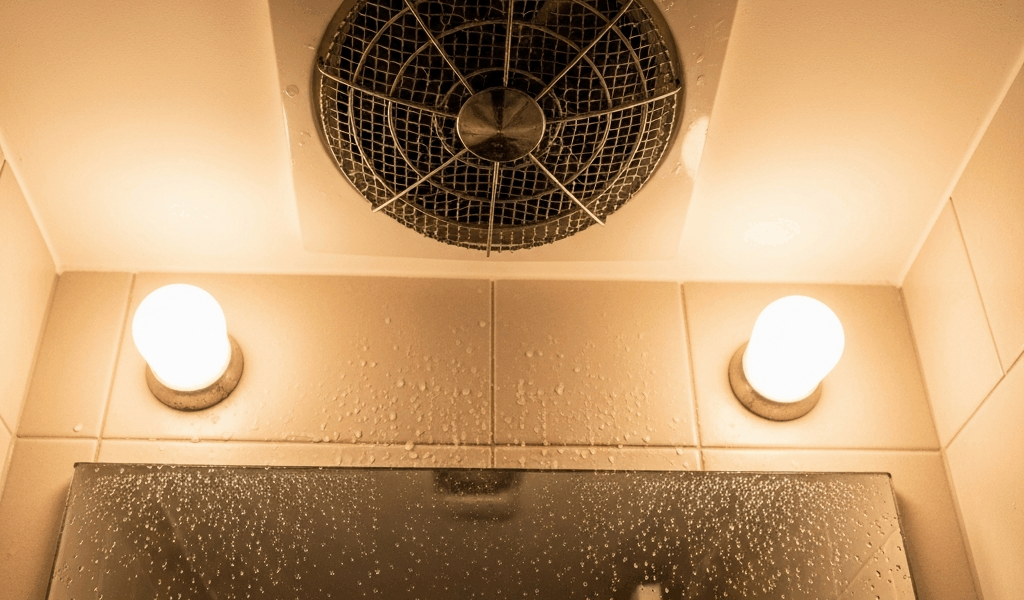
Check the Humidity Sensor First
Most modern bathroom exhaust fans have a built-in humidity sensor that triggers the motor automatically. When moisture in the air hits a certain threshold — usually around 60% relative humidity — the sensor closes a circuit and the fan starts. When humidity drops back below that threshold, the circuit opens and the fan stops.
When a humidity sensor sticks, it stays closed. The fan thinks your bathroom is perpetually steamy and never shuts down.
Here’s how to inspect it yourself:
- Kill the power. Flip the breaker that controls your bathroom. Don’t skip this step. Double-check that the wall switch no longer controls the fan — test it. Safety first.
- Locate the sensor. Open your exhaust fan’s cover or access panel. You’re looking for a small cylindrical or rectangular component, usually plastic or ceramic, about the size of a AA battery. It’s often labeled with humidity percentages or has a tiny window showing its internal element.
- Inspect for buildup. Humidity sensors trap dust and moisture. Look closely. If you see gray film, white mineral deposits, or visible dust, that’s your culprit. The sensor can’t “feel” the air properly when it’s clogged.
- Clean gently. Use a soft, dry cloth — microfiber works great, cotton works fine. Don’t use water or cleaning solutions; those can damage the sensor’s internal element. Gently wipe the sensor’s exposed surface. If there’s stubborn mineral buildup, a barely-damp cloth with distilled water is acceptable, but let it dry completely before restoring power.
- Restore power and test. Turn the breaker back on. Take a hot shower. The fan should kick on as steam builds. After 10 minutes with the shower off, it should shut down within 5 to 10 minutes. If it does, you’ve solved the problem with a $0 fix.
I once traced a continuously running exhaust fan in a Tacoma bathroom to a sensor caked with soap residue and hard water deposits. The homeowner thought the motor was failing. A two-minute wipe-down fixed it. Saved them a $400 service call and a potential motor replacement.
Test the Timer Switch
Not all exhaust fans use humidity sensors. Many rely on manual timer switches — the kind on your wall where you dial 10, 15, or 20 minutes, and the fan runs until the timer expires.
These fail regularly. The internal mechanical or electronic components wear out. When they do, the fan either runs continuously or won’t shut off even when the timer counts down.
Testing requires a multimeter — a $15 to $30 tool available at any hardware store. You’re checking for electrical continuity, which means verifying whether a closed circuit is actually closed.
Here’s what to do:
- Power off at the breaker. Non-negotiable.
- Carefully remove the timer switch from the wall. You might need a screwdriver. You don’t need to fully disconnect it yet — just get comfortable with its physical state.
- Set your multimeter to the continuity setting (usually marked with a sound-wave symbol or Ω with a line through it). Some meters use resistance mode instead; check your manual.
- Turn the dial through a full cycle while touching the meter’s probes to the switch terminals. When you dial past the “off” position, continuity should disappear. If continuity remains constant no matter where you set the dial, the switch contacts are stuck closed. That’s your failure point.
- Replace the switch if it’s faulty. Turn off the breaker, disconnect the wires (take a photo first to remember which wire goes where), unscrew the old switch, screw in the new one, reconnect wires, and test. Replacement switches run $20 to $50 for standard models.
There’s another timer failure mode you should know about — a stuck internal relay. Some inline timer controllers — mounted inside the ductwork or ceiling — use a small relay to cut power to the fan motor. When that relay gets stuck in the “on” position, the fan runs forever. You can’t fix this without replacing the entire controller unit, which costs $40 to $120.
Look for Wiring or Relay Issues
Things get trickier here. Not every continuously running fan is caused by a sensor or timer. Sometimes the problem lives in the wiring itself.
Common scenarios I’ve encountered:
Loose or corroded connections. Moisture from your bathroom condenses inside junction boxes and wire terminals. Corrosion builds up. A connection that should open and close instead gets stuck. You’ll see discoloration, white or green powder-like oxidation, or loose wire nuts. This requires a licensed electrician in Washington and Oregon to fix safely.
Miswired switches. If your fan has multiple switches — one for manual control, another for humidity sensing — incorrect wiring can cause the circuits to bypass each other. The fan turns on via one path and can’t shut off through another. This is less common in new construction but happens in older remodels.
Failed relay in inline controllers. Some bathroom fans have a separate control box mounted in the attic or wall cavity. This box houses a relay — an electromagnetic switch that closes and opens the circuit. When the relay fails, it sticks closed. The fan won’t shut off no matter what you do. A visual warning sign: you’ll hear a constant buzzing or humming sound separate from the fan motor’s normal running noise.
How to spot these issues: If turning off the wall switch doesn’t stop the fan, you’re past the sensor and timer stage. If the breaker physically stops the fan but the switch doesn’t, the problem is downstream of the switch — in relay or relay-adjacent territory. If you hear strange buzzing, clicking, or humming that doesn’t match normal motor operation, that’s a relay struggling.
At this point, diagnosis requires professional tools and knowledge of electrical codes. It’s not a guess-and-check situation.
When to Call a Professional
Not every fan problem is DIY-friendly. Electrical work in bathrooms carries real risks — electrocution hazard, code violations that affect your home’s safety certification and resale value, and potential fire hazards from miswiring.
Washington and Oregon require licensed electricians for any work involving permanent wiring, relay replacement, or breaker-level troubleshooting. Some tasks you can handle yourself: cleaning a sensor, replacing a wall-mounted timer switch with the same model, checking connections for obvious corrosion. Everything else should involve a licensed pro.
Costs vary. A simple sensor cleaning: free to $75 if you hire someone. A timer switch replacement: $150 to $300 including labor. Relay or wiring diagnosis: $100 to $250 for the service call alone, plus $200 to $600 for repairs depending on complexity. Rewiring a fan circuit to fix miswired switches: $300 to $800.
The National Electrical Code requires bathroom exhaust fans to move at least 50 cubic feet per minute and run for at least 20 minutes after shower use to prevent mold growth. A fan that runs continuously actually violates this intent — it’s over-ventilating, wasting energy, and potentially creating negative pressure that can draw in unconditioned air from outside. A properly functioning fan, running on schedule, keeps your bathroom dry without wasting money.
If you’ve tried cleaning the sensor and testing the timer with no results, call a licensed electrician. In the Pacific Northwest, where moisture is our constant companion, having a professional diagnose your fan takes the guesswork out and gets your bathroom back to normal operation.
“`


Stay in the loop
Get the latest northwest electric pros updates delivered to your inbox.