The Power Strip Problem — Why One Outlet Is Not Enough
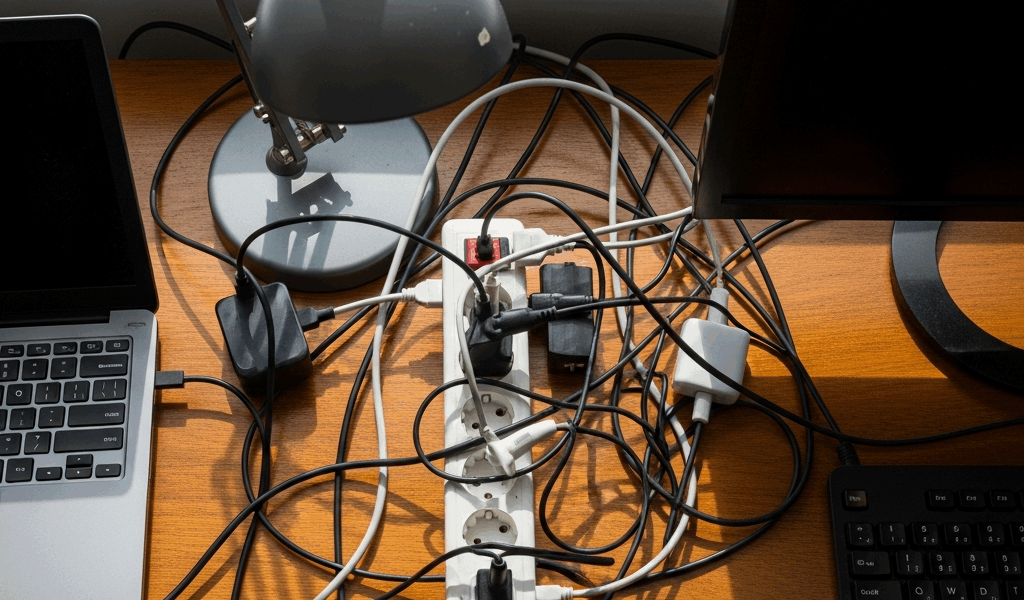
I spent my first three months of remote work staring at a rat’s nest of cables behind my desk. A Dell monitor, a second monitor, a printer, a desk lamp, phone charger, and a space heater—all plugged into one overloaded power strip that was itself plugged into the single outlet behind my desk. The strip was hot to the touch. I’d occasionally smell something acrid. And I never thought much about it until my home insurance agent asked during a property walk-through whether I had any extension cords serving as permanent power sources. When I said yes, he gave me that look. The one where someone realizes you’re living in a small fire hazard.
Here’s where the math gets uncomfortable: a 15-amp circuit in a standard bedroom or office can safely handle about 1,440 watts continuous load — at 80% capacity, per code. A modern desktop computer draws 300–500 watts. Add two monitors at 100 watts each, a laser printer that spikes to 1,000 watts when printing, a space heater running at 1,500 watts, and your phone charger at 20 watts, and you’ve blown past the circuit’s safe capacity before lunch. The power strip doesn’t prevent overload — it just sits there, storing heat and waiting. Probably should have opened with this section, honestly. Most people don’t realize a power strip is not actually a solution. It’s a temporary band-aid that becomes a permanent fire risk the moment you plug it in and forget about it.
How Many Outlets a Home Office Really Needs and Where
The National Electrical Code doesn’t specify a magic number for home offices, but experience and insurance claims have settled on a practical answer: at least four dedicated outlets, ideally six. This sounds excessive until you map the actual workflow. You have your desk. You have the wall opposite your desk — or the wall behind your monitor if it faces one. You have the wall with the door. Each wall should have its own outlet.
Here’s my layout, which works for 90% of home office configurations: two outlets on the wall directly behind the desk. One sits left of center for the computer tower or docking station, the other right of center for monitors and peripherals. One outlet on the left wall at waist-high for the printer or filing cabinet. One outlet on the right wall, also waist-high, for a secondary monitor or backup power. If your desk is centered in the room, a floor outlet in front of the desk eliminates cable runs across the floor — they’re worth the extra cost and complexity because tripping hazards compound over time.
The National Electrical Code requires outlets within 6 feet of any point along a wall. You can’t have a 12-foot wall with one outlet in the middle and call it legal. For a home office, that rule actually works in your favor. It means you can’t get too sparse. Space them 8 to 10 feet apart along the perimeter, and you’ll be both compliant and functional.
Here’s the critical detail most articles skip: a dedicated circuit. If your home office shares a 15-amp circuit with a hallway, guest bathroom, and a bedroom, adding one outlet won’t solve anything — the bottleneck is still upstream at the breaker. You’ll want to identify whether your office is on a dedicated circuit. Kill the breaker for that circuit and see what stops working. If only the office goes dark, you’re isolated. If lights in three rooms go out, you’re sharing. That means you’ll need a new line from the panel — electrician territory, covered below.
Adding an Outlet to an Existing Circuit Step by Step
Assume you’ve confirmed your office has its own circuit and the capacity is available. Here’s how to add an outlet without calling someone.
Step 1: Gather your tools and materials. You’ll need a voltage tester — a non-contact tester like the Klein Tools NCVT-1 runs about $30. A drywall saw, also around $30 for a manual one. An old-work electrical box or new-work box depending on whether you’re cutting into existing wall space. 14-gauge Romex cable (or 12-gauge if you’re on a 20-amp circuit). Wire strippers. Needle-nose pliers. A Phillips screwdriver. Most hardware stores bundle the box, cable, and outlet together for under $25.
Step 2: Turn off power at the breaker. Flip the breaker for the circuit serving the wall where you want the new outlet. This is not optional. Test the existing outlet with your voltage tester to verify it’s dead. Touch the tester to the hot (brass) and neutral (silver) slots. No beep means dead. Do it twice. Electricity kills fast and quiet.
Step 3: Locate the existing outlet you’ll tie into. Find the nearest outlet on the same circuit. You’re going to run new cable from this outlet to your new location. Mark your new outlet location on the wall — usually 12 to 18 inches above the baseboard, unless you’re going for a desktop-level outlet. Thirty-six inches high is becoming standard in new builds.
Step 4: Open the existing outlet box and examine the wiring. Unscrew the outlet and pull it forward. You’ll see black (hot), white (neutral), and bare copper (ground) wires. Each connects to a terminal on the outlet — brass for hot, silver for neutral, green for ground. Write down which wire goes where. Some outlets have screw terminals; some have backstab ports (the holes in the back). Use only the screw terminals. Backstabs are loose after six months, and loose connections arc and burn. I learned this by finding a warm outlet with scorched plastic inside.
Step 5: Run the new cable. This is the physical bottleneck. You’re running cable from the existing outlet to your new box location inside the walls. Use a drywall probe or a coat hanger to feel for obstructions — pipes, ducts, studs. If the wall is clear, push the cable through. Hold it at the outlet box and feed it from the new location. If there’s a stud blocking the path, you’ll need to cut a notch and cover it with a metal guard. Or run the cable through the attic if the wall is accessible from above.
Step 6: Cut the drywall at the new location and install the box. Use your drywall saw to cut a rectangular hole sized for your electrical box. Feed the cable into the box, secure the box to the wall studs, and screw it in place. The box should sit flush with the drywall face.
Step 7: Strip and connect the wires. Strip half an inch of insulation from the black, white, and bare copper wires at both ends. At the new box, connect black to the brass terminal, white to the silver terminal, and bare copper to the green terminal. Screw each down tight — a half-turn past hand-tight. At the original outlet, disconnect the old outlet and connect the new cable in the same configuration. You’re now in series: breaker → old box → new cable → new box → new outlet.
Step 8: Screw in the outlet and test. Push the outlet into the box and screw the plate on. Flip the breaker back on. Use your voltage tester at both the old and new outlet. Hot and neutral should light the tester at both locations. If nothing lights, flip the breaker back off immediately and recheck your connections.
When You Need a New Circuit — and an Electrician
Adding an outlet to an existing circuit works if that circuit has spare capacity. A 15-amp circuit can safely handle 1,440 watts. If your office already draws 1,200 watts, you’re out of room. Same problem if your office shares a circuit with other rooms — the load is split, and you lose headroom fast.
Space heaters, laser printers, and multi-monitor rigs need their own 20-amp circuit. A dedicated 20-amp run from the main breaker panel costs $500 to $1,200 depending on distance, local codes, and whether the panel has available slots. Panel upgrades, if you’re out of breaker slots, run $2,000 to $4,000. Most electricians will also pull a permit — $50 to $200, depending on your city — which requires an inspection. You can’t skip the permit. Insurance companies ask, and they will deny claims if work wasn’t permitted.
Distinguish between adding an outlet to an existing circuit and running a new circuit from the panel. The first is DIY-able if you know basic wiring. The second is licensed electrician only. The panel is the danger zone. Touching the wrong terminal at 200 amps is fatal. I mention this not to scare but to set a real boundary: some work stays off the DIY list.
Upgrades Worth Doing While the Wall Is Open
USB-C receptacles. A standard outlet with a USB-C port built in eliminates the need for a separate charger block. Leviton and other manufacturers sell them for $25 to $40. Wire it exactly like a standard outlet — no extra steps. If you’re opening the wall anyway, add two. Your desk will thank you.
Surge-protective receptacles. These have a built-in surge protector and cost $15 to $25 per outlet. They reduce the need for separate power strips and add insurance against voltage spikes. They’re not a replacement for a whole-home surge protector at the panel, but they’re a practical layer two.
Smart outlets. Outlets with WiFi and scheduling cost $20 to $40. They let you turn devices on and off remotely or on a timer. Useful for a printer that should sleep after hours, or a space heater on a safety schedule. Wire them like any other outlet — they run on standard circuits.
Before adding receptacles, use the home-office wiring and circuit planning guide to inventory loads and identify adopted-code requirements.



Stay in the loop
Get the latest northwest electric pros updates delivered to your inbox.