Why the Breaker Being Fine Doesn’t Mean the Circuit Is Fine
Electrical troubleshooting has started getting harder to follow with all the misinformation flying around. As someone who spent years watching homeowners misdiagnose dead outlets, I taught myself the working side of why your breaker looks perfectly fine while your outlet sits completely dead. Today, I will share it all with you.
Here’s what trips people up: a circuit breaker guards an entire circuit — not individual outlets. When it trips, everything on that circuit dies. So one dead outlet with a normal-looking breaker almost certainly means the breaker isn’t your problem at all.
That distinction changes everything about where you look. You’re not standing at the panel second-guessing yourself anymore. You’re hunting for a secondary protection device hiding somewhere else in the house — probably somewhere you’ve never thought to check. The failure point is downstream from the breaker. Could be a tripped GFCI. Could be a loose connection inside the outlet box. Could be a bad outlet.
The good news? You can narrow this down yourself before spending money on a service call.
First Thing to Check — Every GFCI Outlet in the House
Quick note before the rest of this. This one issue accounts for roughly 40% of dead-outlet calls, and most homeowners never consider it.
But what is a GFCI outlet? In essence, it’s that outlet with the TEST and RESET buttons — usually in bathrooms, kitchens, garages, or outdoors. But it’s much more than that. One tripped GFCI can kill power to every standard outlet wired downstream on the same circuit. Most people have no idea that’s even possible.
Frustrated by a dead bedroom outlet, a homeowner once spent forty-five minutes at her panel convinced the breaker had failed — only to find a tripped GFCI in her hall bathroom had taken out three rooms simultaneously. Kitchen outlet dead? Check the garage. Dead living room outlet? That exterior outlet you forgot about may have gotten soaked during last week’s rain. That’s what makes GFCI troubleshooting so maddening to us DIYers — the culprit is almost never where you’d expect it.
Here’s exactly where to look:
- Master bathroom
- Guest bathroom
- Kitchen countertop (especially near the sink)
- Garage or workshop
- Basement (finished or unfinished)
- Any outdoor outlets — front, back, side of house
- Laundry room
When you find a GFCI, look at those red and black buttons. A tripped GFCI usually has the RESET button popped out slightly — but not always. Press it firmly. Nothing? Press harder. Still nothing? Try pressing TEST first, which should cut power, then press RESET.
I learned this the hard way when my garage outlets went completely dead in January. Spent twenty minutes convinced the panel had developed a serious issue. Walked inside, hit RESET on the kitchen GFCI, and three circuits came back instantly. Don’t repeat what I did.
Check every single GFCI in the house — even the ones that look perfectly fine. All of them. Before you do anything else.
Check for a Tripped Breaker That Doesn’t Look Tripped
Your breaker might actually be tripped. You just can’t tell.
Most people picture a tripped breaker sitting fully in the OFF position. Sometimes that’s true. Plenty of breakers, though, trip to a middle position — halfway between ON and OFF. From across the room, it reads as normal. You’d walk right past it.
Open the panel. It’s fine — seriously. Look at all the switch positions. They should point the same direction, either all right or all left depending on your panel style. A breaker sitting at even a slight angle is suspicious. I’m apparently sensitive to this kind of thing and my Square D panel makes it obvious, while my neighbor’s older Siemens panel never shows it cleanly.
Found a suspect breaker? Flip it fully OFF first — then back ON. Do that for any breaker that looks even slightly off. Even breakers that appear fully engaged sometimes need that mechanical reset to clear a half-trip condition.
One more thing while you’re here: your panel probably has no labels, or labels so old they’re illegible. Grab a strip of blue painter’s tape and a Sharpie. Flip each breaker off one at a time, walk through the house to see what lost power, write it down, label the panel. Thirty minutes total. Saves years of guessing — and costs about $0.40 in tape.
After cycling the breakers, walk back to the dead outlet. Power restored? Done. Still dead? Keep going.
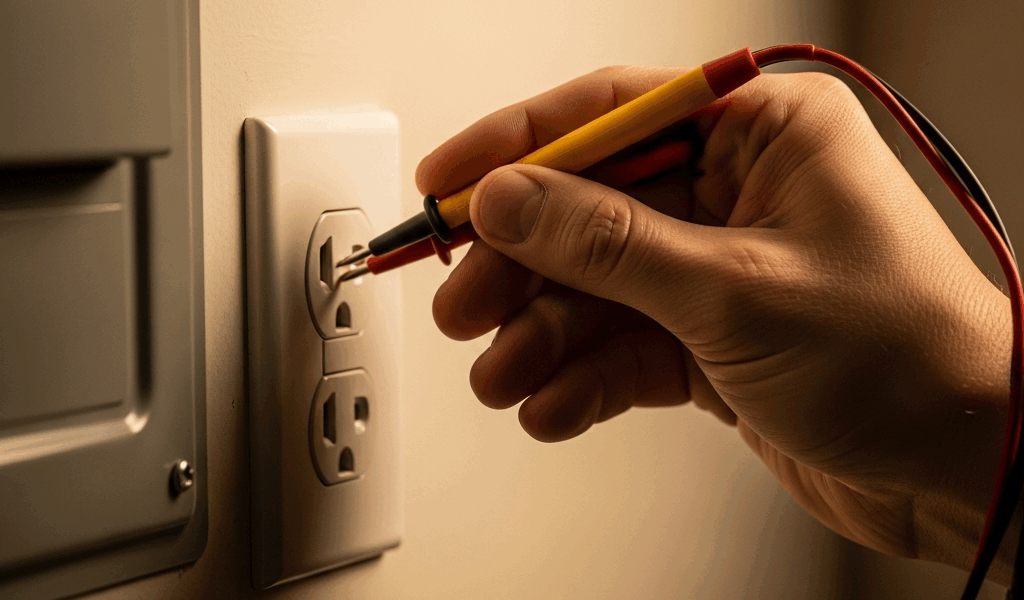
How to Test the Outlet Itself With a Simple Plug-In Tester
A plug-in outlet tester runs twelve to fifteen dollars. Get a basic one — the three-light style that shows different indicator patterns. Not a multimeter. Not an app. A $13 Klein Tools tester from Home Depot tells you everything you actually need to know at this stage. So, without further ado, let’s dive in.
Plug the tester into the dead outlet. Here’s how to read what you see:
- No lights at all: Complete power loss. Either the breaker is still tripped and you missed it, or there’s a broken connection somewhere upstream from this outlet.
- Only one or two lights glow: Open neutral or open ground. A wire connection upstream has come loose or disconnected entirely. Don’t use this outlet — this needs professional attention.
- All three lights glow but the outlet still doesn’t work: The outlet itself is bad. Replace it. Twenty-minute job, standard flathead screwdriver, new outlet costs about $2.50 at any hardware store.
An open neutral — probably the most common result after ruling out a tripped GFCI — usually means a connection inside another outlet box along the same circuit has failed. Often it’s a backstab connection. Those are the little push-in slots on the back of outlets where installers shove wires in rather than wrapping them around the screw terminals properly. They work fine for years, then they don’t.
Tester shows an open neutral? Stop here. That’s not a DIY fix.
When to Stop DIYing and Call an Electrician
You’ve reset every GFCI. You’ve cycled every breaker. You’ve run the plug-in tester. The outlet still doesn’t work — or the tester showed an open neutral or open ground. That’s where professional help begins.
While you won’t need a full electrical inspection, you will need a handful of things only an electrician can properly do: pull the outlet from the wall, inspect every wire termination inside the box, trace the circuit upstream through the walls, and locate exactly where the break occurred. They carry a Fluke multimeter — the 117 model runs around $130 — which provides far more diagnostic data than your basic tester. They can also follow a circuit through walls without tearing into your drywall.
A licensed electrician might be the best option here, as dead-outlet diagnosis requires physical access to connections inside walls. That is because the actual break point is almost never at the outlet that stopped working — it’s usually one or two outlets upstream, behind walls you can’t see into.
Diagnostic work typically runs $100–$150 in most markets. The actual repair — tightening a loose connection, replacing a backstabbed outlet with a proper screw-terminal connection — adds another $50–$200 depending on what they find. Multiple dead outlets on the same wall? Call someone immediately. Don’t keep troubleshooting.
If you’ve walked through every step in this sequence and hit a wall, reach out to a licensed electrician in your area to finish the job correctly and confirm nothing else on that circuit is quietly failing.
You’ve already done the real work — systematic elimination, proving the breaker is fine, narrowing down the failure point. Honestly, that’s most of the battle right there.


Stay in the loop
Get the latest northwest electric pros updates delivered to your inbox.